An XHTML Reference for Authors creating markup for the PianoFinders.com web site by Karen E. Lile
Back in the stone ages (1998) of web development, we used to use Microsoft Frontpage as a web authoring program. Because we were new to web design and wanted to keep things simple, we let the Frontpage program create the code for us that would appear in the browsers. Also, back then, CSS (Cascading Style Sheets) was not compatible with a lot of browsers, so it was not a practical tool for us. Besides, we didn't know enough about programming to use it anyway. We created our web site, assuming that most people would be using browsers of 600 px wide by 400 px high with Netscape Navigator 4x and Microsoft Internet Explorer 4x. We used tables to control the design of the pages and focused on content creation and navigation. This worked great in the beginning. In fact, the content was so rich and valuable to our clients, we started ranking high on the search engines.
In 2005, I purchased a 19" monitor and everything looked different in that format. The pages were left justified and there was a lot of white space on the bottom and right side of each page. Also, since we had more than 1000 pages in our web site, and had created these pages over several years, the design from page to page was not consistent. It was time to revisit the design and programming decisions we had made in 1998. So, I spent several months camped out in the library, Barnes & Noble bookstore and at home reading everything I could about the various types of code available.
After my research, I decided to redesign the site with two open-source codes, XHTML and CSS. This allows me to separate the content of the page and its "markup" (XHTML) from the design elements of the page (CSS). The short story is that I created a master design page that would govern the look of all the pages in my site. Having the content and markup seperate from the design masters, also makes it possible for me to create other master design pages will create "Printer Friendly Versions" and versions for hand held devices and readers for the blind without having to rewrite the markup for each design version. And within the master pages, I put the CSS code (and bug fixes for the various browsers that aren't webstandards compliant) so that my web site pages are legible on all types of browsers and monitors.
The purpose of this page is to help authors who are writing for my web site be able to have some knowledge of how to create the markup for their page content so that they have some control over the design. Below follows examples, codes, and explanations of the various markup language and what it looks like when used with the CSS master that this page is attached to.
I am currently in the process of re-coding all of the pages within the pianofinders.com website. This is not a small project and I anticipate it will take a few months, since I am doing it all myself. So, if you are traveling from one page to another in the site and there are some inconsistancies, you know that the "old" coded pages will be soon replaced by the new.
Enter Header 2 Content Here
This is the h2, used for the 2nd level of headers. The first level h1 is not seen by anyone except search engine, except on legacy browsers, hand held devices and telephones.
Code sample written below:
<h2>Enter Header 2 Content Here</h2>
Enter Header 3 Content Here
This is the h3, used for the 2nd level of headers. The first level h1 is not seen by anyone except search engine.
Code sample written below:
<h3>Enter Header 3 Content Here</h3>
Enter Header 4 Content Here
This is the h4, used for the 2nd level of headers. The first level h1 is not seen by anyone except search engine.
Code sample written below:
<h4>Enter Header 4 Content Here</h4>
Commands to change text inside other code tags (i.e. paragraphs)
- Superscript
- Example of a superscriptsup
- Code sample written below:
- <sup>sup</sup>
- Emphasis
- Example of an emphasis on a particular word, sentence or paragraph.
- Code sample written below:
- <em>emphasis</em>
- Strong
- Example of a strong emphasis on a particular word, sentence or paragraph.
- Code sample written below:
- <strong>strong</strong>
- Registered Trademark
- Example of a Registered Trademark ®
- Code sample written below:
- & reg; (with no spaces between )
- Span
- Example of a Span span span span
- Code sample written below:
- <span>Span span span span</span>
- Quotes
- Example of a Quotes that are part of text and not code "quotation marks in text"
- Code sample written below:
- & quot; (with no spaces between )
- Ampersand
- Example of Ampersand that are part of text and not code: Mason & Hamlin
- Code sample written below:
- & amp; (with no spaces between )
An Unordered List.
When you have a list of items that you don't want numbered, use the unordered list. Here is an example of an unordered list
- List item one
- List item two
- List Item three. This can also be a long paragraph that you just want to indent from the rest of the text. Or this can be a long paragraph that you just want to indent from the rest of the text. Or this can be a long paragraph that you just want to indent from the rest of the text. Or this can be a long paragraph that you just want to indent from the rest of the text.
- Code sample to set up an unordered list
- <ul>
- <li>List item one</li>
- <li>List item two</li>
- <li>List item three</li>
- </ul>
An Ordered List
When you have a list of items that you want numbered, use the ordered list. You don't have to assign numbers to the items. The list items will automatically be numbered starting from first to last. Here is an example of an ordered list:
- List item one
- List item two
- List Item three. This can also be a long paragraph that you just want to indent from the rest of the text. Or this can be a long paragraph that you just want to indent from the rest of the text. Or this can be a long paragraph that you just want to indent from the rest of the text. Or this can be a long paragraph that you just want to indent from the rest of the text.
- Code sample to set up an ordered list
- <ol>
- <li>List item one</li>
- <li>List item two</li>
- <li>List item three</li>
- </ol>
An Definition List
When you have a list of terms you want to define, use the definition list. You can also use this for any type of list where you want a similar layout. Here is an example of a definition list:
- First term to be defined:
- This is the definition of the first term
- Second term to be defined:
- This is the definition of the first term
- Third term to be defined:
- This can also be a long paragraph that you just want to indent below the term above. Notice how it wraps around and justifies left. This can also be a long paragraph that you just want to indent below the term above. Notice how it wraps around and justifies left. This can also be a long paragraph that you just want to indent below the term above. Notice how it wraps around and justifies left. This can also be a long paragraph that you just want to indent below the term above. Notice how it wraps around and justifies left.
- Code sample to set up a definition list
- <dl>
- <dt>Term One</dt>
- <dd>Definition for term one.</dd>
- <dt>Term Two</dt>
- <dd>Definition for term two.</dd>
- <dt>Term Three</dt>
- <dd>Definition for term three.</dd>
- </dl>
Writing text
Most of the content you write will be divided into paragraphs. This text is an example of what text looks like within a paragraph command. Notice that any code you write in XHTML, unlike HTML needs to be closed at the end. Code is usually opened with <code> and ends with </code> where "code" is the particular code letter that you want to identify. For example in the paragraph code, the code is the letter p. Another rule of XHTML is that all the letters in your code should be lower case. You can use uppercase in the actual URL, but the rest of the code should be lower case.
- Code sample to set up paragraph
- <p>Put all your paragraph content here</p>
Blockquotes
There are several different types of blockquotes that I have set up. The first is a regular blockquote, that will justify on the right side of the center content column and the text will float along the leftside of it.
Blockquote: here is an example of text in a block quote. Also if you place a paragraph command within the blockquote, it will come up as follows.by Karen E. Lile
When placing the blockquote, you will notice that you might have to try different placements because the size of the browser window and the type of monitor that the viewer has can affect how the text scrolls around the blockquote. It is not exactly sequential with the text
- Blockquote
- <blockquote>
- <p>Author's name here</p>
- </blockquote>
- Blockquote#left
- <blockquote id="left">
- <p>Author's name here</p>
- </blockquote>
- Blockquote#box
- Blockquote#left
- <blockquote id="box">
- <p>Author's name here</p>
- </blockquote>
The programmer can ad id="name" where "name" equals a unique identifier made up by programmer. Then the programmer can set up the CSS (Cascading Style Sheet) which is imported into the page that you are writing your XHTML for so that it will achieve a particular design. For example, you will see in the code above that I have created a blockquote#left and a blockquote#box. I will put examples of that in this text.
When you use the blockquote#box command, you can actually place text the varioius types of lists and tables along with the text within it and it will be all appear inside of the box.
- For an example, go to Touchweight to see a blockquote box with a paragraphs and a table inside.
- Throughout this page, I may use Lorem Ipsum to demonstrate layout features when I need more text than I have content for a particular section. For an interesting article on what Lorem Ipsum means go to http://www.lipsum.com
You will notice that inside the blockquote#box, the paragraph command uses italics without having to put an emphasis command in it
Also it has a fixed width of 300 px wide. When a browser window is reduced to 800 px wide, the box will fill the center column and the text will appear above and below it. But if the browser window is wider, then the text will wrap to the left of the box.
Lorem ipsum dolor sit amet, consectetuer adipiscing elit. Nam blandit aliquam pede. Nulla quis ipsum. Donec facilisis bibendum mi. Donec non orci vitae ligula facilisis luctus. Maecenas tellus enim, congue id, scelerisque a, congue sit amet, leo. Vestibulum ante ipsum primis in faucibus orci luctus et ultrices posuere cubilia Curae; Praesent convallis purus eu tortor. Class aptent taciti sociosqu ad litora torquent per conubia nostra, per inceptos hymenaeos. In sed nulla non augue commodo fringilla. Nunc ut est a neque mollis nonummy. Pellentesque habitant morbi tristique senectus et netus et malesuada fames ac turpis egestas. Praesent accumsan.
Duis eget enim et enim facilisis dictum. Nulla porta, nisi et tincidunt accumsan, nibh urna rutrum diam, tincidunt iaculis mi ligula quis lacus. Sed id mi. Vestibulum nisl felis, eleifend a, accumsan molestie, accumsan ut, ante. Aenean fringilla nisi nec nisi. Duis ante. Nam convallis pretium est. Donec turpis. Fusce consequat, libero ullamcorper adipiscing malesuada, neque ante consequat felis, ut pretium arcu metus in ante. Vestibulum erat mi, porttitor ut, dapibus vitae, bibendum at, sem. Fusce nonummy erat eu ipsum. Nam tempus faucibus neque. Sed imperdiet, turpis sit amet tempus vestibulum, urna sapien consectetuer urna, nec pulvinar dolor lectus vehicula neque. Pellentesque risus justo, porttitor sed, luctus at, consequat eu, massa. Proin ac leo. Mauris lacinia sem ac lorem. Quisque eu leo. Cum sociis natoque penatibus et magnis dis parturient montes, nascetur ridiculus mus. Nunc pulvinar consequat orci. Proin pulvinar nulla sit amet nibh.
This type of blockquote justifies to the left.by Karen E. Lile
Aliquam ullamcorper urna vel quam. Vestibulum vel lectus. Pellentesque imperdiet quam eu lectus. Sed ut nunc. Phasellus suscipit. Vivamus urna sem, aliquam nec, suscipit vel, posuere vel, eros. Vestibulum sagittis, magna at ultricies nonummy, velit elit commodo arcu, sed commodo mi dui ac est. Phasellus luctus tellus sed nulla. Quisque tristique lorem vitae massa. Mauris vestibulum, neque et sodales tristique, magna mauris ornare justo, eu tincidunt lorem odio et velit. Vivamus posuere erat vitae quam. Nam pulvinar tortor vel massa. Integer et nisl. Phasellus et metus. Maecenas pretium luctus turpis. Morbi eget nulla.
Nulla viverra, massa in sollicitudin euismod, orci tellus ultrices dui, id semper tortor nisi et metus. Ut ornare ornare lacus. Nullam pulvinar malesuada nunc. Sed sollicitudin. In faucibus elementum augue. Ut suscipit porttitor felis. Duis eleifend, erat a convallis facilisis, nulla pede fringilla pede, non aliquet massa lacus consectetuer justo. Quisque urna mi, sollicitudin eu, varius nec, tempor sed, risus. Duis vel elit. Curabitur odio neque, mattis quis, bibendum sit amet, dictum nec, risus.
Maecenas nec magna in tellus egestas lacinia. In hac habitasse platea dictumst. Aenean a dolor ac augue porta egestas. Mauris consectetuer ullamcorper ligula. Curabitur et sapien sed enim scelerisque egestas. Nullam in tellus et sem consequat ultrices. Nam sollicitudin erat posuere nibh. Nulla auctor, magna at pretium tempor, enim urna lacinia elit, id convallis lectus augue ac quam. Nunc turpis. Proin lacus lectus, tempor sed, sagittis sagittis, convallis vitae, nibh. Vivamus purus. Nulla in diam.
Setting Up Navigation Inside a Page
Often, you may need to set up navigation within a particular page. This requires first creating an anchor (a bookmark) and then creating a link that goes to that bookmark.
- The anchor
- Code example:
- <a name="topofpage"></a>
- Link to the anchor within the same page
- Code example: Top of Page
- <a href="#topofpage">Top of Page</a>
- Link to the anchor within another page
- Code example: "What is a spinet?"
- <a href="/faqs/buyer_faq.htm#b5">What is a spinet?</a>
The rules for linking to an anchor point are that if the anchor is within the same page as the link to the anchor, you don't need to name the page, just put a # in front of the name of the anchor. If the anchor point is in another page than the link, then name the page and follow the page URL with # and the name of the anchor. You can see this in the examples above.
Inserting photos
Photos are very easy to insert once you know the appropriate code for the look you want. I have set up some basic designs for photo placement and size. You will notice that I am using a <div> command. Each div command below has an =id next to it that calls up the particular code that gives it the design you see below. You can also delete class=caption line altogether if you don't want a caption. The div id= commands I have set up are listed below:
#Imagefloatleft

Caption for your photo goes here
You will notice that the text in this paragraph wraps around the right side of the photo. The photograph is on the left. When making a .jpg for the photograph, it should be 200 to 220 pixels wide set to 100px resolution. (This will give the text the proper spacing around the photograph.) The entire width including the photograph is 250 pixels wid. The photo can be as high as you want it.
Lorem ipsum dolor sit amet, consectetuer adipiscing elit. Nam blandit aliquam pede. Nulla quis ipsum. Donec facilisis bibendum mi. Donec non orci vitae ligula facilisis luctus. Maecenas tellus enim, congue id, scelerisque a, congue sit amet, leo. Vestibulum ante ipsum primis in faucibus orci luctus et ultrices posuere cubilia Curae; Praesent convallis purus eu tortor. Class aptent taciti sociosqu ad litora torquent per conubia nostra, per inceptos hymenaeos. In sed nulla non augue commodo fringilla. Nunc ut est a neque mollis nonummy. Pellentesque habitant morbi tristique senectus et netus et malesuada fames ac turpis egestas. Praesent accumsan.
- <div id="imagefloatleft">
- <img alt="The text you write here will appear if the browser rejects photos" src="/img/KRB-KLcombo2.jpg" />
- <p class="caption">Caption for your photo goes here</p>
- </div>
#MainImage
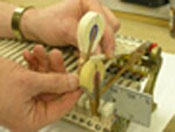
Kendall Ross Bean, Founding Director of Piano Finders

Photo should be 150px wide with 100 px resolution
Text wraps around photo. Photo is left justified. The width of the space in which photo sits is 180 px. The photo can be as high as you want it to be.
Lorem ipsum dolor sit amet, consectetuer adipiscing elit. Nam blandit aliquam pede. Nulla quis ipsum. Donec facilisis bibendum mi. Donec non orci vitae ligula facilisis luctus. Maecenas tellus enim, congue id, scelerisque a, congue sit amet, leo. Vestibulum ante ipsum primis in faucibus orci luctus et ultrices posuere cubilia Curae; Praesent convallis purus eu tortor. Class aptent taciti sociosqu ad litora torquent per conubia nostra, per inceptos hymenaeos. In sed nulla non augue commodo fringilla. Nunc ut est a neque mollis nonummy. Pellentesque habitant morbi tristique senectus et netus et malesuada fames ac turpis egestas. Praesent accumsan.
Duis eget enim et enim facilisis dictum. Nulla porta, nisi et tincidunt accumsan, nibh urna rutrum diam, tincidunt iaculis mi ligula quis lacus. Sed id mi. Vestibulum nisl felis, eleifend a, accumsan molestie, accumsan ut, ante. Aenean fringilla nisi nec nisi. Duis ante. Nam convallis pretium est. Donec turpis. Fusce consequat, libero ullamcorper adipiscing malesuada, neque ante consequat felis, ut pretium arcu metus in ante. Vestibulum erat mi, porttitor ut, dapibus vitae, bibendum at, sem. Fusce nonummy erat eu ipsum. Nam tempus faucibus neque. Sed imperdiet, turpis sit amet tempus vestibulum, urna sapien consectetuer urna, nec pulvinar dolor lectus vehicula neque. Pellentesque risus justo, porttitor sed, luctus at, consequat eu, massa. Proin ac leo. Mauris lacinia sem ac lorem. Quisque eu leo. Cum sociis natoque penatibus et magnis dis parturient montes, nascetur ridiculus mus. Nunc pulvinar consequat orci. Proin pulvinar nulla sit amet nibh.
- <div id="mainimage">
- <img alt="The text you write here will appear if the browser rejects photos" src="/img/KRB-KLcombo2.jpg" />
- <p class="caption">Caption for your photo goes here</p>
- </div>
#Imagefloatleft350

Black Key Groups: Click on photo for Larger Version
Text wraps around photo. Photo is left justified. The photo should be 330 px wide and 100 px resolution. The width of the space in which photo sits is 350 px. The photo can be as high as you want it to be. You will notice that I added a link to the photo so that when you click on it, it will go to another page. I also added a strong emphasis on some of the words within the photo caption.
Lorem ipsum dolor sit amet, consectetuer adipiscing elit. Nam blandit aliquam pede. Nulla quis ipsum. Donec facilisis bibendum mi. Donec non orci vitae ligula facilisis luctus. Maecenas tellus enim, congue id, scelerisque a, congue sit amet, leo. Vestibulum ante ipsum primis in faucibus orci luctus et ultrices posuere cubilia Curae; Praesent convallis purus eu tortor. Class aptent taciti sociosqu ad litora torquent per conubia nostra, per inceptos hymenaeos. In sed nulla non augue commodo fringilla. Nunc ut est a neque mollis nonummy. Pellentesque habitant morbi tristique senectus et netus et malesuada fames ac turpis egestas. Praesent accumsan.
- <div id="imagefloatleft350">
- <a href="/pianomanual/middleCillustrations.htm#BlackKeyGroups"><img alt="The text you write here will also appear if you hover the mouse on the photo on most browsers" src="/img/twosthrees.jpg" /></a>
- <p class="caption"><strong>Black Key Groups:</strong> Click on photo for Larger Version</p>
- </div>
Using wider photos: You can place a photo that is wider than 350 px in any of these left justified photo <div>s. But, there is some modification of the code within the page that is necessary to achieve that. The entire <div class="secondcol"> must be deleted from the xhtml on that page so no text will appear in the right hand column. Otherwise, the photo will overlap the text in the right hand photo. It is best if only the webmaster does this, so there will be no mistakes in the coding.
#Imagefloatright350

Piano Finders Third Showroom
Text wraps around photo. Photo is right justified. The photo should be 170 to 175 px wide and 100 px resolution. The width of the space in which photo sits is 200 px. The photo can be as high as you want it to be.
Lorem ipsum dolor sit amet, consectetuer adipiscing elit. Nam blandit aliquam pede. Nulla quis ipsum. Donec facilisis bibendum mi. Donec non orci vitae ligula facilisis luctus. Maecenas tellus enim, congue id, scelerisque a, congue sit amet, leo. Vestibulum ante ipsum primis in faucibus orci luctus et ultrices posuere cubilia Curae; Praesent convallis purus eu tortor. Class aptent taciti sociosqu ad litora torquent per conubia nostra, per inceptos hymenaeos. In sed nulla non augue commodo fringilla. Nunc ut est a neque mollis nonummy. Pellentesque habitant morbi tristique senectus et netus et malesuada fames ac turpis egestas. Praesent accumsan.
Duis eget enim et enim facilisis dictum. Nulla porta, nisi et tincidunt accumsan, nibh urna rutrum diam, tincidunt iaculis mi ligula quis lacus. Sed id mi. Vestibulum nisl felis, eleifend a, accumsan molestie, accumsan ut, ante. Aenean fringilla nisi nec nisi. Duis ante. Nam convallis pretium est. Donec turpis. Fusce consequat, libero ullamcorper adipiscing malesuada, neque ante consequat felis, ut pretium arcu metus in ante. Vestibulum erat mi, porttitor ut, dapibus vitae, bibendum at, sem. Fusce nonummy erat eu ipsum. Nam tempus faucibus neque. Sed imperdiet, turpis sit amet tempus vestibulum, urna sapien consectetuer urna, nec pulvinar dolor lectus vehicula neque. Pellentesque risus justo, porttitor sed, luctus at, consequat eu, massa. Proin ac leo. Mauris lacinia sem ac lorem. Quisque eu leo. Cum sociis natoque penatibus et magnis dis parturient montes, nascetur ridiculus mus. Nunc pulvinar consequat orci. Proin pulvinar nulla sit amet nibh.
- <div id="imagefloatright">
- <img alt="Piano Finders Third Shop" src="/img/KRB-KLcombo2.jpg" />
- <p class="caption">Piano Finders Third Showroom</p>
- </div>
#Imagefloat350c
Certificate of Registration For Piano Finders Trademark

Text does not wrap around photo. Photo is centered. The photo should be no more than 350 px wide and 100 px resolution. The smallest width of the space in which photo sits is 350 px. The photo can be as high as you want it to be. You will notice that I have included a h2 and a h4 inside the photo's <div> These headers are centered along with the photo. I also did not include a caption.
- <div id="imagefloat350c">
- <h2>Certificate of Registration For Piano Finders Trademark</h2>
- <img alt="Piano Finders Certificate of Registration" src="/img/PFTrademarkCertificate-med.jpg" />
- </div>
Tables
| Downweight | Upweight | Sum (D + U) | Difference (D-U) | Meaning |
|---|---|---|---|---|
| High | High | High | Normal | Heavy Hammers orother parts |
| High | Low | Normal | High | High Friction |
| Low | High | Normal | Low | Low Friction |
| Low | Low | Low | Normal | Light Hammers or other parts |
Code:
- <table summary= "This is table that helps you see relationships between upweight and downweight.">
- <caption>Relationship between Upweight and Downweight</caption>
- <thead>
- <tr>
- <th id="downweight">Downweight</th>
- <th id="upweight">Upweight</th>
- <th id="sum" abbr="sum">Sum (D + U)</th>
- <th id="difference" abbr="difference">Difference (D-U)</th>
- <th id="Meaning">Meaning</th>
- </tr>
- </thead>
- <tfoot>
- <tr>This table is from the Touchweight article</tr>
- </tfoot>
- <tbody>
- <tr>
- <td headers="downweight">High</td>
- <td headers="upweight">High</td>
- <td headers="sum">High</td>
- <td headers="difference">Normal</td>
- <td headers="meaning">Heavy Hammers orother parts</td>
- </tr>
- <tr>
- <td headers="downweight">High</td>
- <td headers="upweight">Low</td>
- <td headers="sum">Normal</td>
- <td headers="difference">High</td>
- <td headers="meaning">High Friction</td>
- </tr>
- <tr>
- <td headers="downweight">Low</td>
- <td headers="upweight">High</td>
- <td headers="sum">Normal</td>
- <td headers="difference">Low</td>
- <td headers="meaning">Low Friction</td>
- </tr>
- <tr>
- <td headers="downweight">Low</td>
- <td headers="upweight">Low</td>
- <td headers="sum">Low</td>
- <td headers="difference">Normal</td> <td headers="meaning">Light Hammers or other parts</td>
- </tr>
- </tbody>
- </table>
For a detailed explanation of what the code within the table mean, and why we are using ids within the code, see "Chapter 3: Tables are Evil?" from Web Standard Solutions: The Markup and Style Handbook by Dan Cederholm